How to Protect Your Privacy on iOS (iPhone & iPad)
Please note that these instructions may not apply to all iOS devices and operating systems. You might also be interested in our privacy tips for Android.
Follow these easy steps to protect the personal data on your iPhone or iPad.
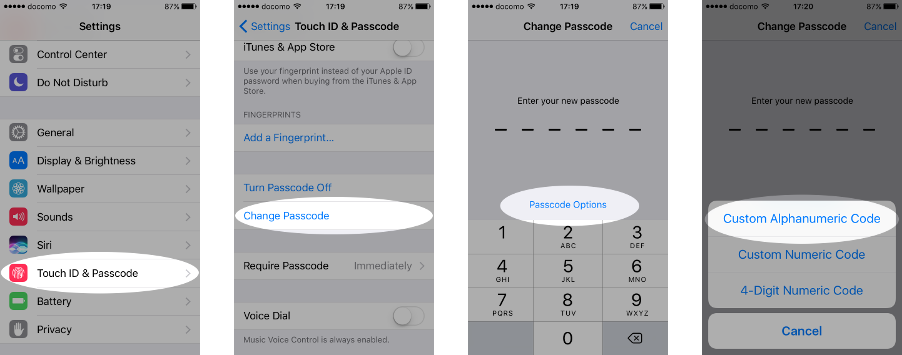
1. Lock your device with a passcode longer than 4 digits.
Let’s start off with the entry point to your phone — the passcode. A custom one will give you the choice of alphanumeric characters and the ability to make it longer than the usual 4 characters.
How: Settings > Touch ID & Passcode > Change Passcode > Passcode Options
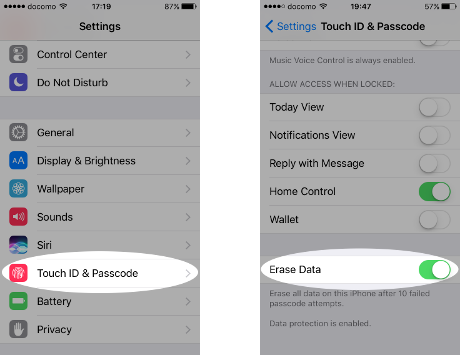
2. Enable “Erase Data” to delete data after 10 failed passcode attempts.
In the unlikely event your phone is stolen, you can reduce the risk of your data getting in the wrong hands by setting it to delete everything after 10 failed passcode attempts.
How: Settings > Touch ID & Passcode > Erase Data
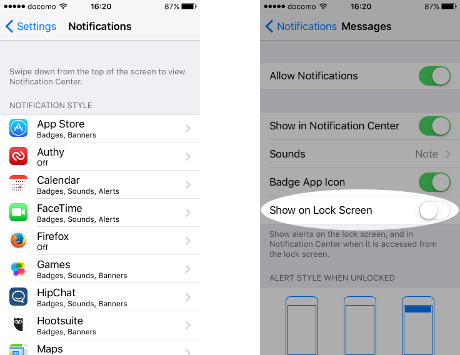
3. Don’t show notifications in the lock screen for sensitive apps.
Even if your phone is not stolen, your private messages could be seen by others as notifications on the lock screen. These notifications can be turned on or off for each app.
How: Settings > Notifications > [app name] > Show on Lock Screen
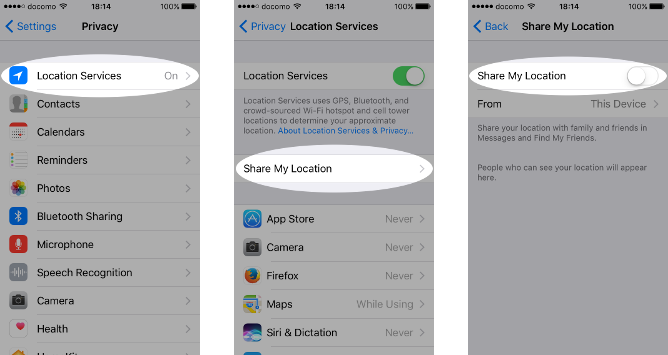
4. Turn off “Share My Location.”
Your phone goes everywhere with you and shares that information with family and friends. Turning this off will protect your location data should your family and friends’ devices ever get into the wrong hands.
How: Settings > Privacy > Location Services > Share My Location
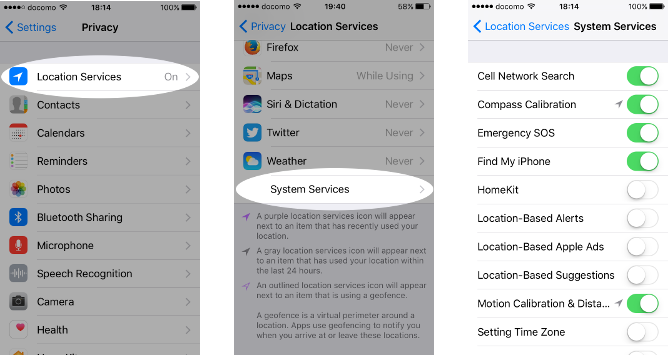
5. Turn off location services for things that don't need them.
Sometimes apps seem excessively hungry for our data, including location. You can switch off their access to your location one by one. You should also check access granted to built-in services that may be unnecessary.
How: Settings > Privacy > Location Services (> optionally System Services)
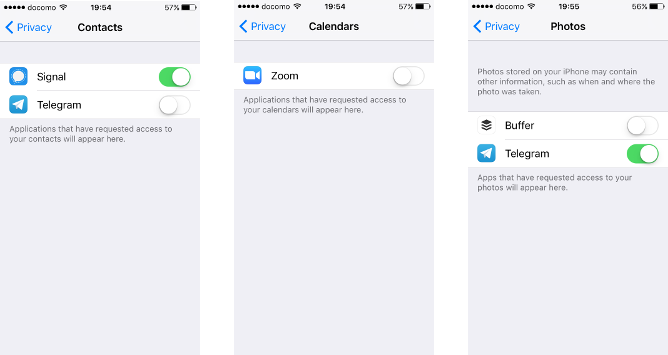
6. Turn off access to sensitive data for apps that don’t need it.
Similarly, you can restrict access to your most private data from apps that don’t need it, for example access to your contacts, calendar, photos, etc.
How: Settings > Privacy > Contacts, etc.
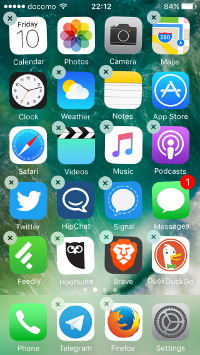
7. Review your installed apps.
To further reduce your exposure to privacy leaks, take a few moments to check every app on your device and remove any you no longer use.
How: Long-press any app icon on the home screen. Alternatively, Settings > General > Storage & iCloud Usage > Manage Storage
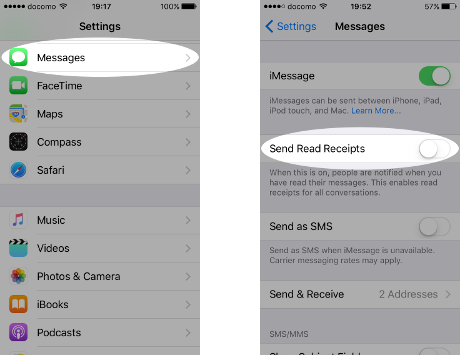
8. Turn off read receipts so people are not notified when you see their messages.
This is more a personal preference, but you may not want senders to see when you have read their message.
How: Settings > Messages > Send Read Receipts
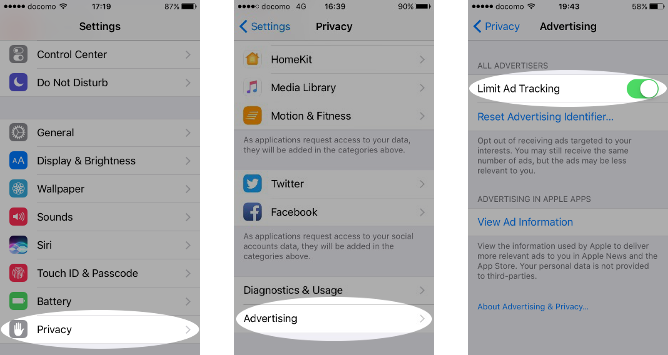
9. Turn on “Limit ad tracking”.
Ad tracking is used by advertising networks to target ads at you in apps. Limiting this restricts tracking of ads across apps.
How: Settings > Privacy > Advertising
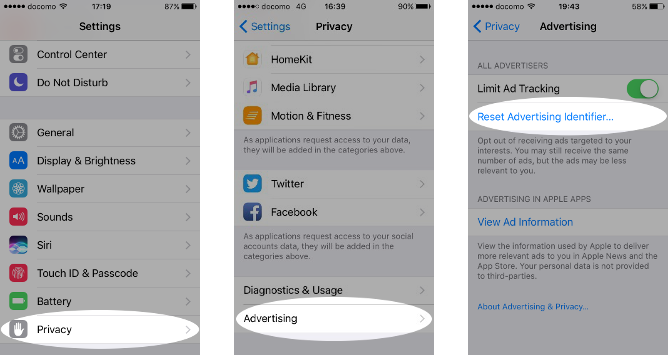
10. Reset your advertising identifier from time to time.
The above “Limit ad tracking” setting relies on the honesty of app developers. You can add an extra layer of privacy protection by resetting the ad identifier for your device.
How: Settings > Privacy > Advertising > Reset Advertising Identifier
11. Install the DuckDuckGo Privacy Browser - and set it as your default.
Our browser has built-in tracker network blocking, smarter encryption, and, of course, private search, all designed to operate seamlessly together while you search and browse the web.
How: Get the browser from the App Store or https://duckduckgo.com/app.
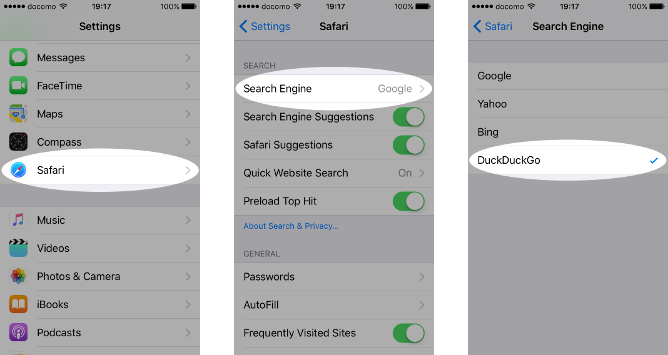
12. Set DuckDuckGo as your default search engine.
Not using the DuckDuckGo browser for iOS yet? You can still search anonymously with DuckDuckGo.
How: For Safari, go to Settings > Safari > Search Engine > DuckDuckGo. For other mobile browsers, see our help pages.
Congratulations! You’ve just taken a big step to increasing mobile privacy and protecting the data on your iPhone or iPad. You might also be interested in our privacy tips for Android.
For more privacy advice follow us on Twitter, and stay protected and informed with our privacy newsletter.
